Essential Tools Needed for Repotting Plants: Urban Indoor Gardening Tips for Apartment Oasis
Creating a small indoor garden in your apartment is easier than you think. An indoor garden adds beauty and fresh air to your space. Repotting plants is a key part of plant care, and knowing the tools needed for repotting plants makes it even simpler. In this guide, you will find budget-friendly DIY garden tools and tips to help you start your urban indoor gardening journey.
The Importance of Proper Repotting for Indoor Plant Health
Repotting is more than just moving a plant to a new pot; it’s essential for keeping your indoor garden healthy. When plants grow, their roots need more space. If they stay in the same pot too long, they can get root-bound. This means their roots circle around tightly and can’t absorb nutrients or water well. Without enough nutrients, your plants may look sad and droopy, like they just got out of bed after a long night.
Why does repotting matter?
In urban indoor gardening, space is limited. Plants can also quickly use up the nutrients in the soil. So, keeping an eye on your plants and knowing when to repot is key. Here’s a quick checklist to help you know when to repot:
- Roots are coming out of the bottom of the pot.
- You see roots growing out of the sides.
- The plant looks stunted or unhealthy.
- Soil dries out too quickly after watering.
These signs show that your plant needs a new home! Remember, repotting helps ensure your plants get the best chance to thrive in your small space.
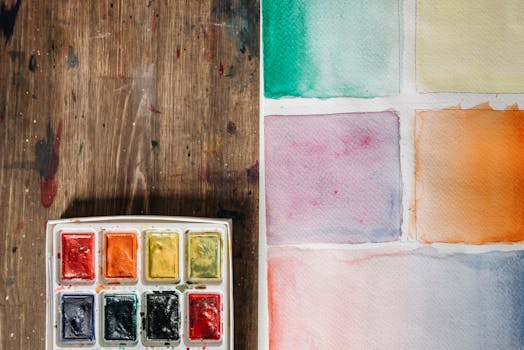
Must-Have Tools Needed for Repotting Plants in a Small Space
To make repotting easy and effective, you need the right tools. Here are the essential DIY garden tools you should have in your apartment garden:
Quality Pruners and Scissors
These are important for trimming roots and leaves. Good pruners help keep your plants healthy by removing any dead or unhealthy parts. (Think of it like giving your plant a little haircut.)A Sturdy Trowel
A trowel is a small shovel great for digging and moving soil. Choose one that fits your hand well for better control, especially in tight spaces.A Portable Potting Tray
This tray keeps your workspace clean. It catches any dirt or mess while you work. (You’ll thank yourself later when you don’t have to vacuum the entire kitchen!)A Watering Can with a Gentle Spray
A watering can with a long spout helps you control the water flow. This protects delicate roots and prevents overwatering, which can lead to root rot.
These tools are not only effective but also budget-friendly DIY garden tools. You can find great DIY garden tools at local stores or online.
Example of Improvement
Let’s say you have a struggling pothos plant. After using quality pruners to trim the unhealthy leaves and a sturdy trowel to repot it into fresh soil, you notice it starts to perk up. The right tools make a big difference in plant health!

Best Practices for Repotting in an Urban Indoor Environment
Repotting can seem daunting, but with the right steps, you can do it easily. Here’s a detailed guide on how to repot plants in a small space.
Preparing Your Workspace
Start by finding a clean, flat surface to work on. Lay down some old newspapers or a tarp to catch any spills. Gather your materials: new pot, potting soil, and your tools. You want everything close at hand, so you don’t have to run around looking for things.
Step-by-Step Instructions for Effective Repotting
Water Your Plant
A few hours before repotting, water your plant. This helps loosen the soil and makes it easier to remove the plant from its pot.Remove the Plant
Gently squeeze the pot to loosen the soil. Turn the pot upside down while supporting the plant. If it doesn’t come out easily, wiggle it a bit. (Don’t pull too hard, or you might break the roots!)
To learn more about the overall process, check out our comprehensive repotting indoor plants guide.
Examine the Roots
Check for any root problems. If the roots are circling tightly, gently tease them apart. Trim any dead or damaged roots with your pruners.Add Fresh Soil
Put a layer of fresh potting soil in the new pot. Place the plant in the center and fill around it with more soil, packing it lightly.Water Again
After repotting, give it another drink. This helps settle the soil around the roots.
Tips for Easing the Process
- Proper Watering Techniques: Always water before and after repotting to keep the plant hydrated.
- Soil Handling: Use a potting mix that retains moisture but drains well. Look for mixes with peat moss and perlite.
Real-Life Example
Consider a balcony gardener who had a tomato plant that was not growing well. By following these steps, they repotted it into a larger container with fresh soil. Within days, they saw new growth, showing the power of proper repotting techniques.

Maintaining Your Indoor Garden
Once you repot your plants, it’s important to care for them properly. Here are some plant care basics to follow:
Light: Ensure your plants get enough light. Most indoor plants thrive in bright, indirect sunlight. If your apartment is dark, consider using grow lights.
Watering: Water your plants when the top inch of soil feels dry. Overwatering is a common mistake, so always check first.
Fertilizing: Use a balanced fertilizer every few weeks during the growing season. This adds nutrients back into the soil.
Humidity: Many indoor plants love humidity. If your air is dry, mist your plants or place a small humidifier nearby. (They’ll feel like they are back in the tropics!)
Final Tip: Keep a small garden journal. Note down when you repot, water, and fertilize. This helps you keep track of your plant’s needs.

By following these steps and using the right tools, you can transform your urban apartment into a lush oasis. Happy gardening!
FAQs
Q: I’m planning to repot several plants this season, but I’m not sure which specialized tools can help make the process smoother and less messy—what should I invest in?
A: To make repotting smoother and less messy, invest in a good quality watering can with a long spout for precision watering, a hand fork for aerating soil, and a dibber for making holes in the potting mix. Additionally, having a sharp knife for taking cuttings and hormone rooting powder can be beneficial for propagating new plants.
Q: I’ve noticed a difference in how various plants respond during repotting—are there specific tools that work better for certain types of plants or potting situations?
A: Yes, specific tools can enhance the repotting process for different plants. For instance, a sharp knife is useful for taking cuttings and separating root-bound plants, while a dibber can help create holes in the soil for planting. Additionally, using a proper watering can and mister ensures precise watering and humidity control for delicate plants during repotting.
Q: Maintaining clean, efficient tools is something I haven’t thought much about before—what steps should I take to care for them and prevent cross-contamination between different plants?
A: To care for your gardening tools and prevent cross-contamination, ensure that they are kept scrupulously clean after each use. This includes thoroughly cleaning the tools with soapy water and disinfecting them regularly, especially after handling different plants to avoid transferring diseases. Additionally, store them in a dry place and consider oiling the metal parts to prevent rust.
Q: While I know the basics, I’m curious if there are any additional gadgets that can help optimize the repotting process and reduce common mistakes—what should I look out for?
A: To optimize the repotting process and reduce common mistakes, consider using a plant sensor to monitor soil moisture and light levels, ensuring proper care. Additionally, investing in high-quality pruners and a good watering can with a long spout can help manage your plants effectively and prevent damage during repotting. For more information on plant care, check out our guide on timing and tips for repotting flowering plants.